Vantage Point
A shoot day for me starts very early so I can enjoy first light. I carry much more film than I plan to use and this gives me the confidence to work and interpret a subject with multiple exposures. When I reach a possible subject, I do not interpret by looking through the ground glass of my 4×5”, 5×7” or 8×10” field camera. I set the camera down on it’s tripod and began to walk and circle about the subject using a hand held digital camera with a zoom lens. With the digital sidekick camera up to my eye I began to decide what to address in combination with changing the zoom lens to calculate the final focal length for the camera which accepts only fixed focal length (non zooms) lenses.

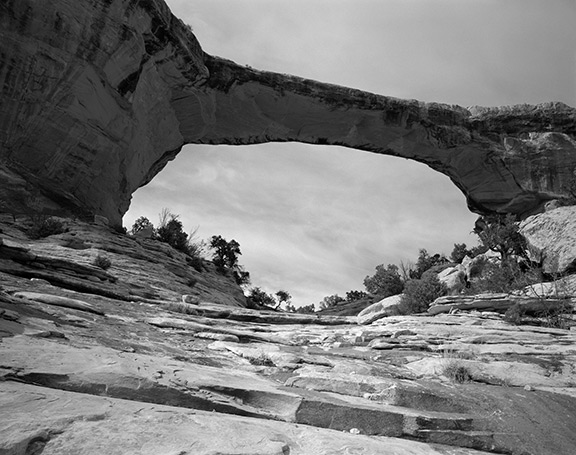
“Owachomo Bridge,” Natural Bridges National Park, Utah, 2000
My first job is to find a vantage point, or where to stand, to make the photograph. I might have to climb a small boulder to add six feet of height to my tripod to ensure a good vantage point. Or, as in the ”Owachomo Bridge” photograph, I used a lower vantage point to emphasize the flowing pattern of rock in the foreground. My next decision after vantage point is to enhance my perspective by choosing a focal length to bring the image onto the ground glass or film plane which has been made clear by the use of the digital camera with zoom lens.
I selected a wide angle lens to make the slick rock advance in the foreground and allowed the large natural Owachomo Bridge to act as a silent shape in the background. I made a series of images by framing more to the left or right by rotating the tripod head. I made the alternative negatives because the larger part of the bridge on the left seems to visually unbalance the symmetrical composition I was working with.
Natural Bridges National Park is in Utah and is an ancient river course which in time created a series of spectacular arches. This National Park is hot and dry and takes a couples hours on foot to see most it.
All Content © Craig Carlson 2012 All Rights Reserved
